
How to make cold process soap: easiest step by step soap making with Emma of The Little Soap Company
This month we head to the Cotswolds to learn step by step soap making (or cold process soap) with Emma Heathcote-James, founder of The Little Soap Company (listed in our directory here). As well as selling her own range of natural, handmade soaps, Emma enjoys sharing her knowledge of this satisfying craft by offering workshops.
Join us as we join her soap-making workshop to create our own natural handmade bars, using natural ingredients and traditional cold pressing. Hot process soap is a type of handmade soap made by combining oils with lye, but unlike cold process soap, the mixture is actively heated during the process to speed up the saponification reaction, allowing the soap to be cut and used much sooner after making. The resulting soap has a more rustic appearance compared to cold process soap and some soap makers prefer this. Cold pressing does producer a finer soap in my opinion, even if it does take a little longer.

Step by step soap making
On my arrival at Honeybourne station, Emma arrives beaming and whisks me off to her lovely Cotswold stone cottage just five minutes from the station. I already know and love the soaps she makes and sells with The Little Soap Company.


After a cup of tea and a homemade lavender cupcake in front of the Aga we head off to the workshop behind the cottage to learn how to make soap. This is where Emma explains that making soap is really no different to cooking. Step by step soap making is all about following the right recipe.

Beginner’s soap making
She hands me the how to make soap course pack containing her beginner’s step by step soap making recipe and promises that we’ll have lots of fun…
Key Takeaways from the pack
• Cold process soap making combines oils with lye solution at approximately 110 degrees Fahrenheit to create a chemical reaction called saponification that transforms the mixture into soap.
• The mixture must reach a consistency called “trace” (thick like custard) before adding fragrances, nutrients, or exfoliants, and then requires 18-24 hours of insulation followed by a minimum 4-week curing period before use.
• Sodium hydroxide (caustic soda) is an essential but highly caustic ingredient that must be handled with protective equipment including goggles, rubber gloves, and long sleeves in a well-ventilated area.
• Cold process soap produces a finer quality product compared to hot process soap, though it requires more time for the soap to cure and harden sufficiently.
• Common base oils for soap making include sustainably sourced palm oil, coconut oil, and olive oil, while additives can include essential oils for fragrance, various carrier oils for nutrients, and natural materials like oats, poppy seeds, or flower petals for texture.
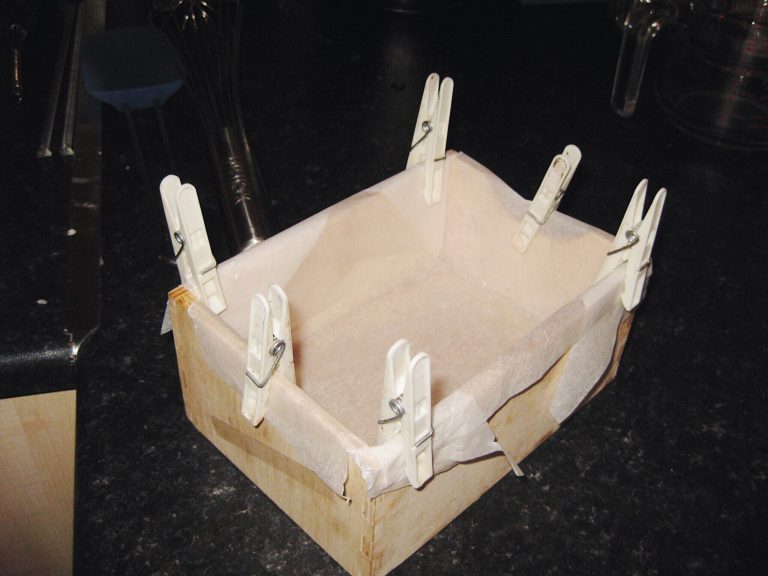
After a bit of such theory, Emma wants to get straight in and get our hands dirty. Our first step is to prepare the mould for our soap by lining a plastic container with greaseproof paper so that the soap will come out easily when set.
How to make natural soap – step by step
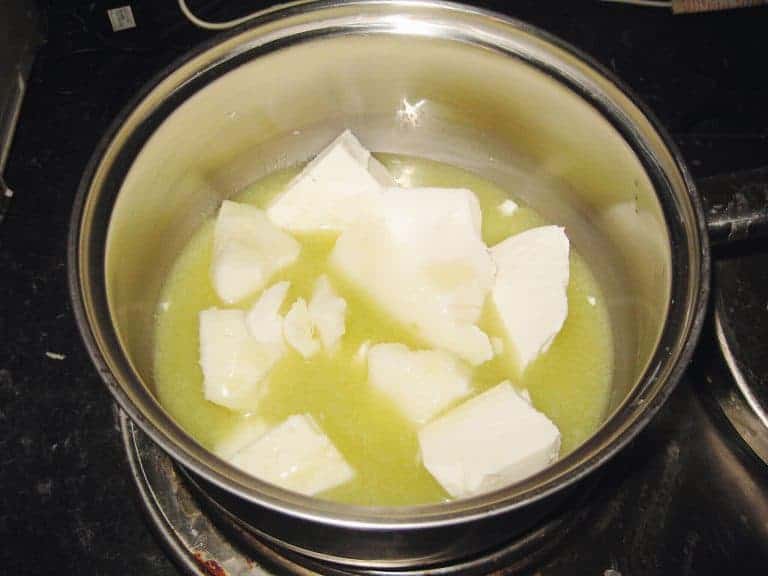
step 1: melting the base
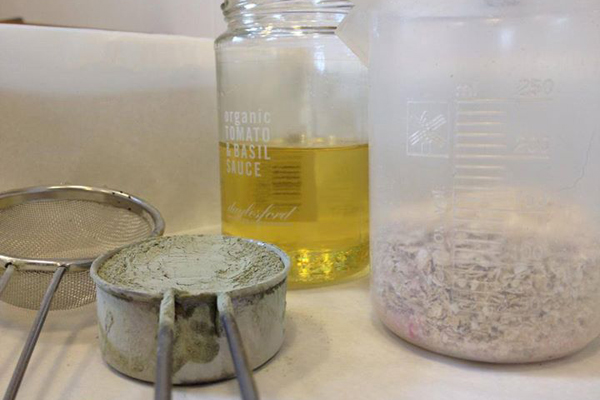
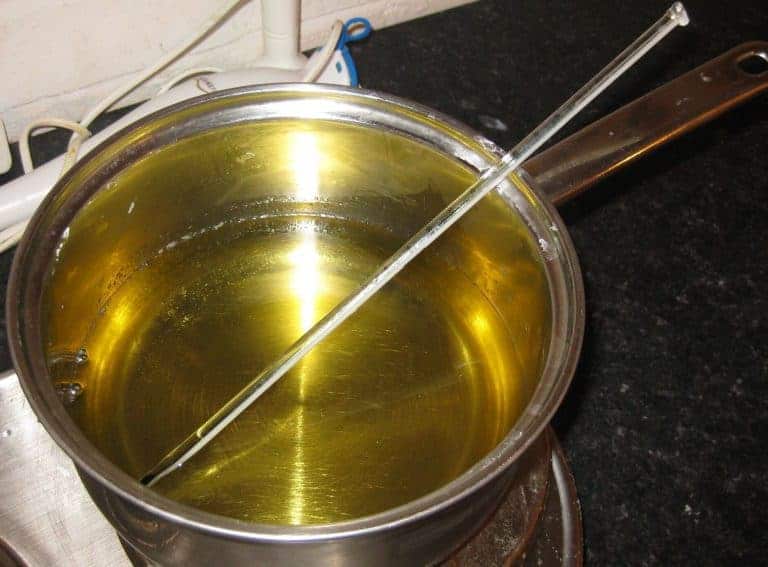
Next we measure out the solid oils that form the fatty acids base of the soap. We used sustainably sourced palm oil, coconut and olive oil. But there are lots of types of oils you could use for this including coconut oil, cocoa butter or shea butter. Next, place them in a saucepan on a low heat until they melt to create an oil mixture. Use a glass thermometer to check for a temperature of around 110 degrees Fahrenheit.

Base Oil Properties & Saponification Values
| Oil Type | Primary Benefit | Hardness Rating |
| Coconut Oil | High lather & cleansing | Very Hard |
| Palm Oil | Stable, long-lasting bar | Hard |
| Olive Oil | Moisturizing, gentle lather | Soft |
| Shea Butter | Creamy texture, skin conditioning | Medium-Hard |
| Castor Oil | Boosts lather & bubbles | Soft |
step 2: preparing the lye
Next important step is to prepare an essential ingredient: a mixture called ‘lye’, or lye solution / lye water, which we will blend with the oils to create the saponification process. This is what turns the mixture into soap. Slightly scary, as it involves using sodium hydroxide (or caustic soda) which is very caustic and must be used with care. Read the cautionary labels before use. Some makers use potassium hydroxide instead of sodium hydroxide lye.
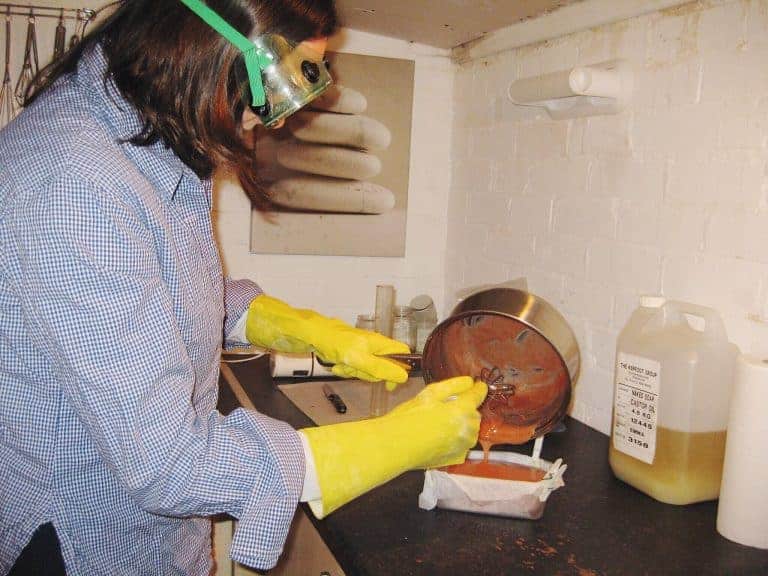
After donning protective goggles and rubber gloves (and wearing long sleeves), we carefully measure out the sodium hydroxide crystals using a lye calculator (or soap calculator). This calculates the precise amount of lye (sodium hydroxide) needed to fully saponify (turn into soap) a specific combination of oils in a soap recipe (known as saponification values).
We mix them into a stainless steel pan of cold distilled water until they have completely dissolved. We do this out in the garden to avoid breathing in any fumes (if you can’t do this outdoors, make sure you’re in a well-ventilated area).
On contact with the water, you need to know that the lye heats up very quickly. The aim is to get it to the same temperature as the melted liquid oils in our other pan. When both the oil and the lye have reached around 110 degrees, the lye is carefully poured into the pan of melted oil, in short bursts, and stirred with a silicone spatula until the mixture gradually starts to thicken.
The Temperature Sweet Spot: Why 110°F Makes or Breaks Your Soap
Most soap making guides tell you to match your oil and lye temperatures, but they rarely explain why the 110°F target is the secret to professional-quality bars.
What Happens at Different Temperature Ranges:
Below 100°F: Your oils may begin to solidify before full saponification occurs, creating an uneven texture with potential pockets of unsaponified oil that can make your soap too soft or even caustic in spots.
110-120°F (The Golden Zone): Both the lye solution and oil mixture remain fluid enough to blend uniformly while encouraging a controlled saponification reaction that produces smooth, consistent bars with predictable curing times.
Above 130°F: The reaction accelerates too quickly, potentially causing your soap to “volcano” out of the mold, create a cracked surface, or develop an overly brittle texture that crumbles when cut.
Pro Technique: Use two separate glass thermometers (never reuse between lye and oils) and take readings from the centre of each mixture, not the edges where temperature can vary by 5-10 degrees.


Safety Equipment Checklist for Lye Handling
| Safety Item | Why It’s Essential | Alternative Option |
| Protective Goggles | Prevents chemical burns to eyes | Safety glasses with side shields |
| Rubber/Latex Gloves | Protects hands from caustic burns | Nitrile gloves (chemical resistant) |
| Long Sleeves | Shields arms from splashes | Apron over short sleeves |
| Ventilated Space | Disperses caustic fumes safely | Outdoor mixing area |
| Stainless Steel Container | Won’t react with sodium hydroxide | Heat-resistant plastic (HDPE #2) |
Step 3: achieving ‘trace’
Next step, we use a handheld blender (or immersion blender / stick blender) to stir the mixture at a brisker pace. This is in order to reach the consistency known as ‘trace’. Trace is achieved when the mixture becomes thick like custard. You know you have trace when a lifted spoon leaves a thin trail on the surface. Once trace has been achieved it’s time for the fun to start. Adding fragrance oil and other ingredients such a nutrients, grains, clays or herbs.

Trace Stages & When to Add Ingredients
| Trace Stage | Visual Indicator | Best For Adding |
| Light Trace | Thin drizzle leaves faint trail | Swirls, colourants, liquid additives |
| Medium Trace | Thick like cake batter | Essential oils, fragrance oils |
| Heavy Trace | Thick like whipped cream, holds peaks | Exfoliants, seeds, oats, petals |
| Too Thick | Clumpy, difficult to pour | Avoid—can’t pour into mould evenly |
Batch 1: Lavender, grapefruit, calendula and poppy soap
Natural Additives & Their Soap Benefits
| Natural Additive | Primary Function | Recommended Amount |
| Poppy Seeds | Gentle exfoliation | 1-2 tablespoons per batch |
| Dried Calendula Petals | Visual appeal, skin soothing | Sprinkle on top only |
| Oats (ground) | Texture, gentle cleansing | 2-3 tablespoons per batch |
| Pink Clay Powder | Natural color, detoxifying | 1 teaspoon per batch |
| Essential Oils | Fragrance, aromatherapy | 1-3% of total oil weight |
For our first soap batch, we decide to add lavender and grapefruit essential oils for fragrance. We add sunflower oil as a nutrient, some dried calendula petals and a sprinkling of poppy seeds for exfoliation. Making your own recipe for this is all about personal preference.


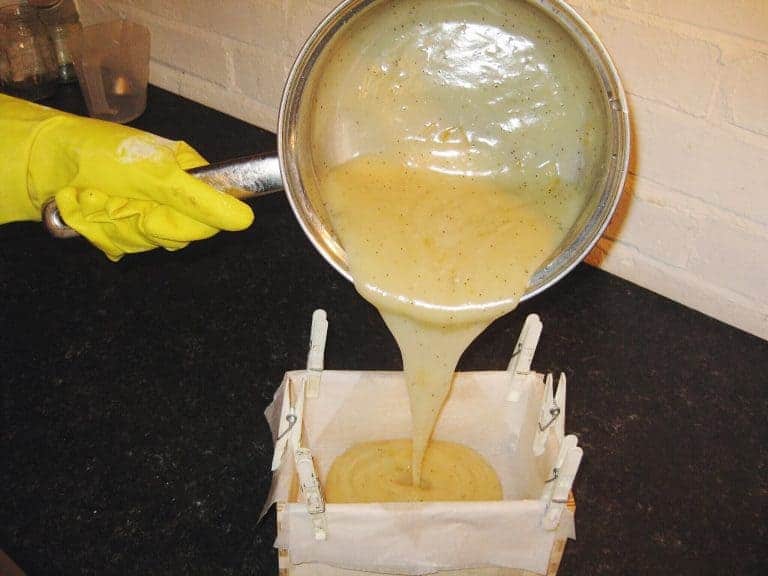
Once the natural additives have been gently stirred in, we pour soap base into its greaseproof paper lined soap mold or soap pot. With the cold precess method, once you pour base into the mould, the soap must then be covered and insulated with an old towel and left in a safe place for up to 24 hours. This is so it can continue to saponify at room temperature. The curing soap batter will generate heat and air bubbles during this essential incubation period and can cause the soap to appear shinier. This is called the gel phase.

The Gel Phase Decision: How to Control Your Soap’s Final Appearance and Hardness
It’s worth bearing in mind that you can choose whether or not the gel phase actually happens. This single decision dramatically affects your finished soap’s look and performance. What you need to know:
Forcing Gel Phase (Vibrant, Harder Bars):
Wrap your mould in towels and place in an insulated box or warm oven (turned off). The soap heats to 140-180°F internally, creating translucent, glossy bars with more vivid colours and a harder final texture that lasts longer in the shower.
Preventing Gel Phase (Matte, Creamy Bars):
Place your mould uncovered in the refrigerator for 24 hours. The soap stays cooler, resulting in opaque, pastel-coloured bars with a creamier lather and softer texture that some users prefer for facial cleansing.
Partial Gel Problem:
If you do nothing and let the soap decide, you may get partial gel—a dark circle in the centre with lighter edges—which is purely cosmetic but looks unprofessional. Always choose one method intentionally.
The Visual Impact: Side-by-side comparison of identical recipes shows gelled soap appears 2-3 shades darker and develops a slight sheen, while ungelled soap maintains a soft, matte finish that photographs beautifully for handmade gift packaging.
After 18-24 hours we were told our soap can be removed from the mould and cut into bars. Then it needs to be left in a cool dry place to cure – see below for more on curing. After curing the soap will have hardened considerably and will be ready to use, or to wrap as a great option as a handmade gift.
Back to my workshop, we finish off our morning’s work by heading to the village pub for lunch. Sausages and mash and a glass of red wine definitely helped to get the creative juices flowing. Now that I’ve mastered the basic soap making technique, Emma lets me loose in the studio to try out some different fragrance and ingredient combinations for myself!
Batch 2: lavender, orange, oats and apricot kernel oil soap
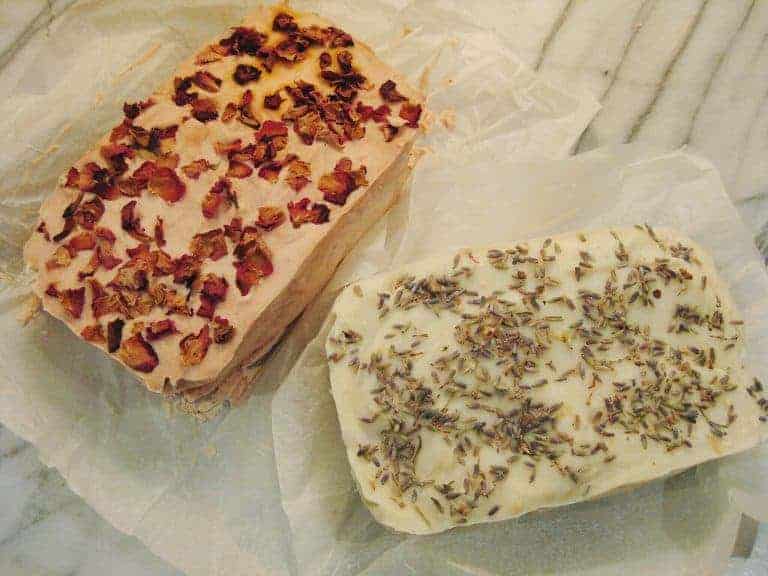
For my first time making a solo batch I decide to add apricot kernel oil as the nutrient, a blend of lavender and orange essential oils for fragrance, some oats for texture, and to finish off with a sprinkling of dried lavender. I was tempted to add flower petals too, but maybe next time.


Batch 3: pink clay, rose geranium and rose petal soap
Now I am really having fun and there is still time left for one last small batch. This time I add a teaspoon of pink clay powder to the diy soap mixture to give it some colour. I also add castor oil as the nutrient, rose geranium essential oil for fragrance, poppy seeds for texture, and a sprinkling of dried rose petals on top for my decadent finale! Homemade soap recipes are so much fun!


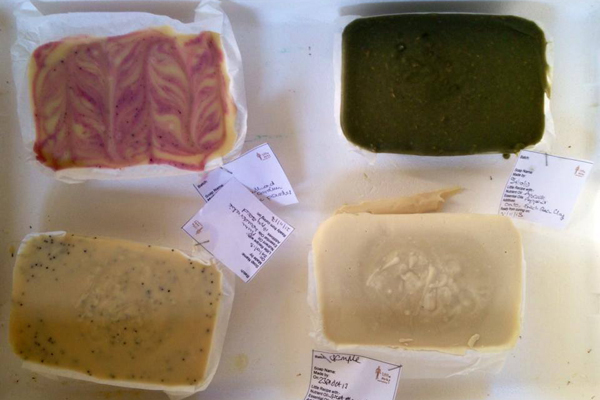
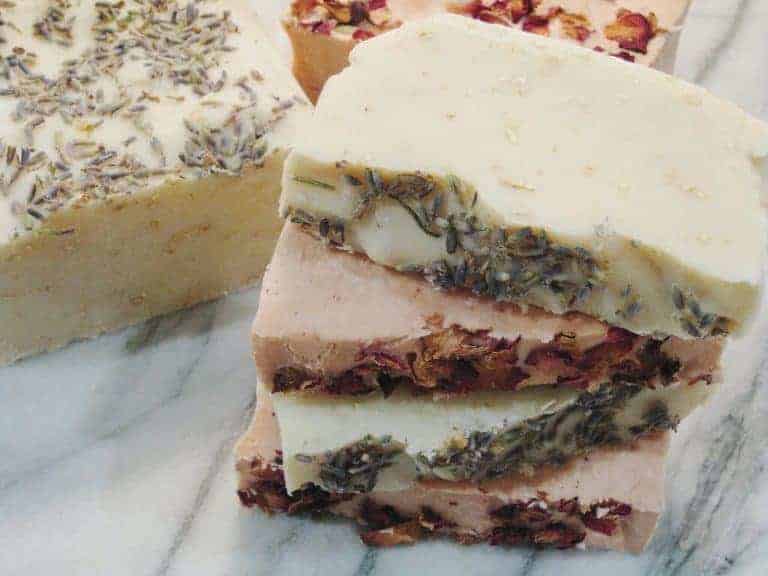
The soft soaps look so beautiful in their paper-lined moulds waiting to set…
By now it’s almost time to catch my train, and I head back home laden with all that I’d made. The heady fragrance of lavender and rose waft behind me all the way. I’d had the most fun, creative day. And I couldn’t wait to take my soaps out of their moulds the following day. I was itching to cut them into soap bars of the finished product.

The next day I am delighted to see that the warm gloopy mixture in a tupperware box, had overnight turned into something resembling a real block of cold-process soap. As I took the lid off, a wonderful fragrance fills the room. So much nicer than store-bought soap.
Step by step soap making: slicing the blocks
Using a kitchen knife, I carefully slice the large blocks into smaller bars on my kitchen work surface. I can’t help marvelling at how something so pretty could be made from a few ingredients and a chemical reaction. Now my soaps have been put away to cure. I can’t wait to get them out again and actually start using them!
Curing Timeline & Storage Requirements
| Time Period | What’s Happening | Storage Conditions |
| 0-24 Hours | Active saponification, gel phase | Covered, insulated, undisturbed |
| 24-48 Hours | Firm enough to unmould and slice | Room temperature on parchment |
| Week 1-4 | Water evaporation, pH balancing | Cool, dry, good air circulation |
| 4+ Weeks | Fully cured, ready to use | Wrapped or boxed for gifting |
| Long-term Storage | Maintains quality 1+ year | Dark, cool, dry location |
The 4-Week Cure Myth: Testing Your Soap’s Actual Readiness
Everyone repeats “cure for 4 weeks,” but this timeline is somewhat arbitrary and can lead to either wasting time with soap that’s ready or using soap that isn’t truly cured.
The Science of Curing:
Curing isn’t just about completing saponification (which finishes in 48 hours)—it’s about water evaporation. Fresh soap contains 25-30% water, while fully cured soap drops to 10-15%. This concentration is what makes the bar harder, longer-lasting, and milder on skin.
The Real Readiness Tests:
Weight Test: Weigh a bar immediately after cutting and again weekly. When weight loss stops (typically 30-40% lighter than original), your soap is truly cured regardless of time elapsed.
pH Test: Use pH strips on a small lather sample. Fully cured soap reads 9-10 pH. Anything above 10.5 needs more time.
Texture Test: Press your thumbnail firmly into a corner. If it leaves an indentation, the bar needs more time. Fully cured soap resists indentation.
The Timeline Reality:
Soaps high in soft oils (olive, sunflower) may need 6-8 weeks, while recipes with mostly hard oils (coconut, palm) can be ready in 3 weeks. Your environment matters too—dry climates cure faster than humid ones. Stop guessing and start testing.

Whether you’re a novice or planning a career change, this workshop is a fun, creative and very entertaining day out. Emma is always on hand with useful tips and advice gained from years of experience. You’ll leave with a full set of step-by-step instructions on how to make soap at home.
That way you can experiment with different fragrance, ingredient combinations and soap additives at home which are the most fun parts. You can also have fun creating intricate designs depending on the type of soap and final product you’re wanting to create. The cold process method definitely does take time but the results are worth every minute.


FAQs
Can I use tap water instead of distilled water for making the lye solution?
Tap water contains minerals, chlorine, and other impurities that can interfere with the saponification process and potentially cause discolouration or unpredictable results in your finished soap. Distilled water ensures a pure, controlled chemical reaction. The small cost of distilled water is worth the consistency and quality it brings to your soap making.
Why did my soap develop a white powdery layer on top after curing?
This is called soda ash, a harmless cosmetic issue that occurs when unsaponified lye reacts with carbon dioxide in the air. It doesn’t affect the soap’s safety or performance and can be prevented by spraying the surface with 99% isopropyl alcohol immediately after pouring into moulds, or simply wiped or planed off the cured bars. Some soap makers embrace it as a rustic, handmade characteristic.
Is it safe to use aluminium or non-stick pans for soap making?
Absolutely not—sodium hydroxide reacts with aluminium and damages non-stick coatings, potentially contaminating your soap and ruining your cookware. Stick to stainless steel, heat-resistant plastic (HDPE #2 or #5), or glass containers for all soap making processes. Many soap makers keep dedicated equipment separate from cooking supplies to avoid any cross-contamination.
Can I speed up the 4-week curing time by using a dehydrator or oven?
While you can use gentle heat to accelerate water evaporation slightly, rushing the cure compromises soap quality by creating an overly brittle bar or uneven drying that leads to warping and cracking. The curing process allows the soap’s pH to stabilize naturally and the bar to harden uniformly. Patience truly produces superior soap that lasts longer and feels better on the skin.
What should I do if I get lye solution on my skin?
Immediately flush the affected area with cool running water for at least 15 minutes—don’t try to neutralise it with vinegar or other substances, as this can create additional heat and worsen the burn. Remove any contaminated clothing while rinsing. After thorough rinsing, if the burn is severe or covers a large area, seek medical attention. For minor splashes, continued rinsing followed by applying aloe vera can help soothe the skin.
KEY THINGS TO REMEMBER
#1 Temperature matching between oil and lye at 110°F is critical because this specific range keeps both mixtures fluid enough for thorough blending while initiating controlled saponification that produces smooth, consistent bars without acceleration or separation issues.
#2 The 18-24 hour insulation period is not optional as the soap must continue saponifying undisturbed at room temperature to complete the chemical transformation, with the gel phase creating the internal heat necessary for proper molecular bonding.
#3 Achieving proper trace before adding fragrances and additives prevents separation because the thick custard-like consistency ensures all ingredients remain suspended and evenly distributed throughout the soap rather than sinking or floating to create quality inconsistencies.
#4 Sodium hydroxide requires serious safety protocols including goggles, gloves, and ventilation because this highly caustic chemical can cause severe burns to skin and eyes, release harmful fumes when mixed with water, and damage non-compatible materials like aluminium.
#5 The minimum 4-week curing period allows water to evaporate and pH to stabilise transforming soft, potentially harsh bars into hard, mild soap through a process that cannot be rushed without compromising the final product’s longevity and skin-friendliness.
Going forwards
Friends and family watch out, you may be receiving soaps from me for a very long time to come. I’ve loved learning the old fashioned ways of soap making and have digital scales and latex gloves at the ready for my next go. I’m not going to attempt large batches, as I’m not planning to sell my creations, just enjoy them as part of everyday life.
Also, I’m wondering about silicone molds and best heatproof containers as I don’t want to ruin my cooking pans. I’m also putting together a list of the different oils I’d like to experiment with for fragrance and aromatherapy. My base recipe will be exactly as Emma showed me, and I’ll be trying streaks of oil in the raw soap to see how that turns out – maybe a thin trace across the top. I’ve seen you can also buy pre-made soap base which is a good idea if measuring out the harmful
You might also like:
Ethical Beauty made in Britain with care
Plastic free zero waste beauty & bathroom ideas
INFORMATION
The Little Soap Company is listed in the From Britain with Love directory
Get all the info you need to connect with The Little Soap Company from the listing >>
Emma offers a variety of one-to-one, couple and small group soap making courses from her workshop. She also offers a more in depth course for people who are thinking about setting up their own soap business. You can also buy soaps online.
Feeling inspired? Take a look at the Creative Workshops category in our Directory, where you’ll find a variety of inspiring courses.
If you run a creative course that would interest our readers, please get in touch. Email us at editor@frombritainwithlove.com
A pin to share to Pinterest


Thanks for this wonderful content. It was very insightful and enjoyable. You have amazing pictures. I have bookmarked your website and will be checking from time to time for more contents.
This was a great read, I really enjoyed its information. This article was very informative and I enjoyed reading it. I learned a lot from this article. I am also very interested and think other people will be too. So, I will share it with my friends. They would like to learn more about this topic.