
Knit a bunny: free rabbit knitting pattern you’ll love and step by step tutorial.
I fell in love instantly when I first came across Claire Garland’s Dot Pebbles knitting patterns last Spring. She has created a menagerie of knitted bunnies, mice, foxes, baby deer and other animals that really do tug at your heart strings. Claire somehow manages to capture the essential beauty and vulnerability of baby animals in her knitting. She has also made a super helpful collection of video tutorials over on youtube
If you’re looking for easter crafts ideas, I have just the thing! Claire has kindly shared her free easter bunny pattern to knit a baby bunny with all the details you need to make one yourself. Or make a whole family of them and fill your home with adorable knitted loveliness! As free easter knitting patterns go this one has to be my absolute favourite and is perfect for popping into Easter baskets as great gifts! The pattern contains all the info you need including needle sizes, and yarn recommendations to make your toy bunny stuffie just like Claire’s! She talks you through all you need to know about getting the stuffed softie animal shape of a bunny just right! Happy knitting!

Claire Garland’s Dot Pebbles baby bunny knitting pattern uses DK or sport weight yarn with 3.5mm needles and features stockinette stitch construction with minimal complicated techniques.
• Proper stuffing technique is critical for achieving an authentic bunny appearance, requiring soft, loose filling particularly around the neck, chin, and belly areas rather than firm overstuffing.
• Face shaping involves manually moulding and indenting the facial features before securing them with stitches, creating the distinctive bunny expression that characterises Dot Pebbles designs.
• The pattern can be customised through yarn experimentation, optional felting with pure wool or alpaca, and duplicate stitch embroidery to create unique markings or bespoke details.
• The free downloadable pattern includes basic knitting techniques such as knit and purl stitches, knitting two together, purling two together, and knitting or purling into front and back of stitches, making it suitable for beginners.
Simple to make, and probably the cutest baby bunny pattern out there, why not have a go at this cute bunny softie yourself? I’d love to see how you get on and to discover your creative ideas. I’ve shared some helpful step by step images and video tutorial by Claire as well as her top tips for getting the look just right. The pattern is free to download just below Claire’s tips. There are also lots of other links to blog post content and other easy knitting pattern ideas of Claire’s and more that you might enjoy making. Enjoy! X
knit a bunny rabbit
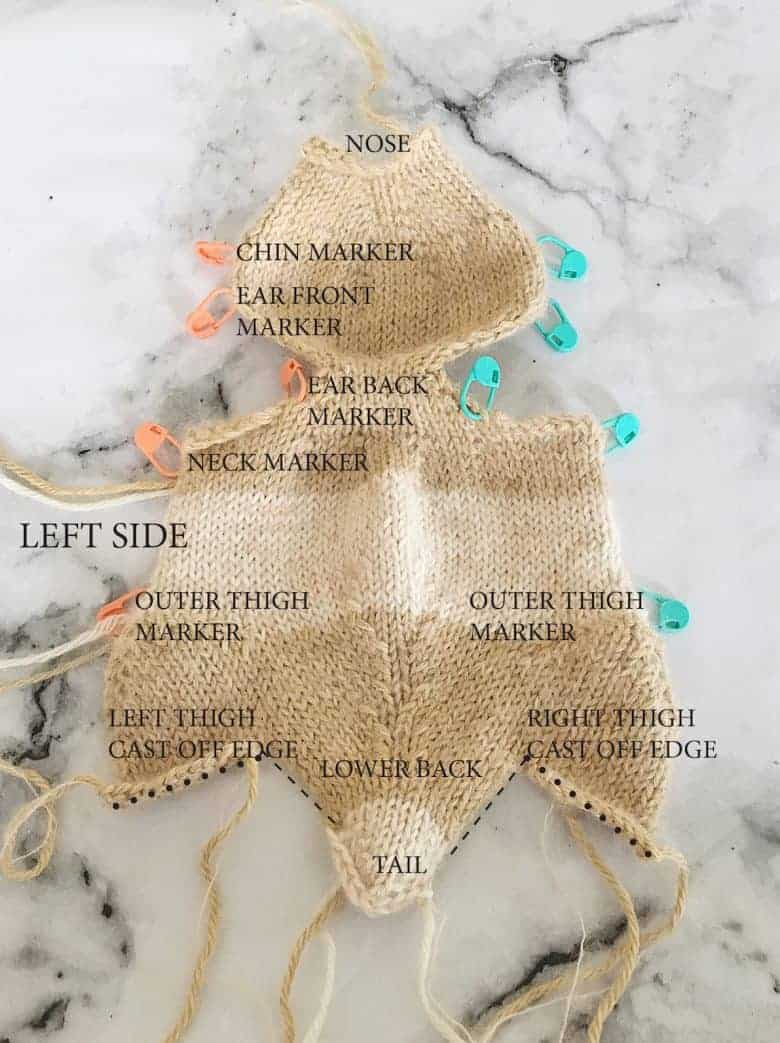
This usefully marked image shows you how your finished knitted piece should look before you start sewing it up with the ends of the yarn showing and markers down right-hand side as well as left to help you line up. Turn bunny over from the wrong side to check you have the right number of stitches can be helpful.
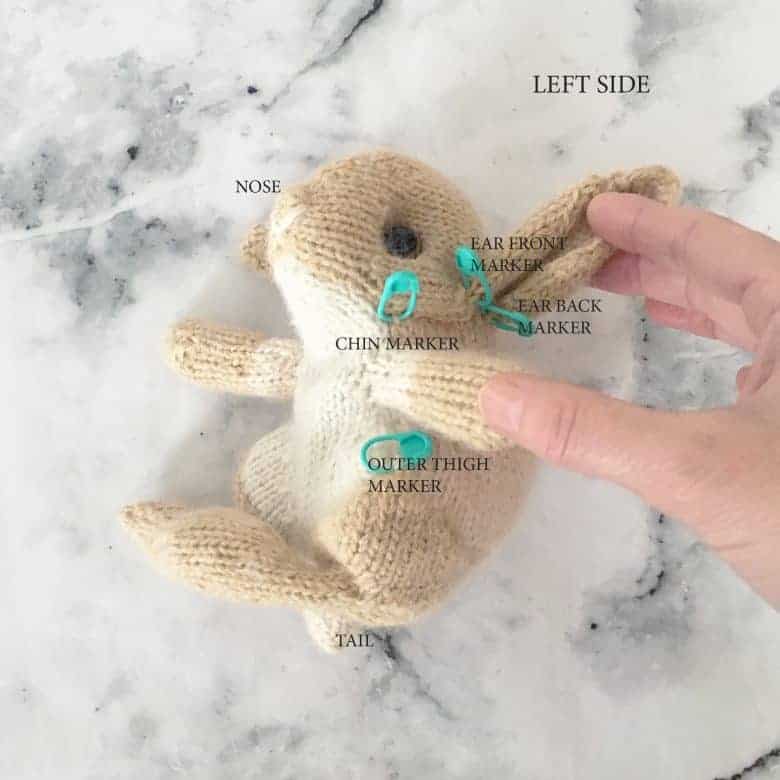
Using the marker pins will help you line up before sewing together.
You will need
Stitch markers
Yarn needle
3.5 mm needles
Yarn of your choice (the pattern specifies DK yarn or sport weight but you can play around with worsted weight yarn or whatever takes your fancy) – Claire specifies the yarn she uses in the pattern and has more tips below.
knit a bunny rabbit video tutorial
This video tutorial by Claire is really helpful when you come to make up your knitted rabbit:
knit a bunny rabbit – 5 essential tips from Claire
Yarn Weight Substitution Guide for Different Bunny Sizes
| Yarn Weight | Needle Size | Finished Bunny Size |
| 4-ply/Fingering | 2.75-3mm | Miniature (8-10cm) |
| DK/Sport (pattern) | 3.5mm | Standard (12-15cm) |
| Worsted/Aran | 4.5mm | Large (18-20cm) |
| Chunky | 5.5-6mm | Extra Large (25cm+) |
1 Don’t overstuff
Definitely my number one tip when you knit a bunny rabbit – don’t over stuff! If you look at real bunnies they are quite loose-fleshy so try and emulate this with your stuffing – especially around the neck and chin and belly areas.
The Science Behind the Squish: Why Less Stuffing Creates More Realistic Bunnies
Most knitters instinctively overstuff their toys, thinking more filling equals better quality. But real rabbits possess loose, mobile flesh that shifts and settles naturally. This is why the “face squish” technique works so brilliantly.
The Professional Stuffing Method:
• Fill to only 60-70% capacity in body areas
• Leave neck region especially loose to allow natural head movement
• Concentrate firmer stuffing only in the base for stability
• Test by gently pressing—it should give easily, not spring back
• Add stuffing in thin layers rather than large clumps
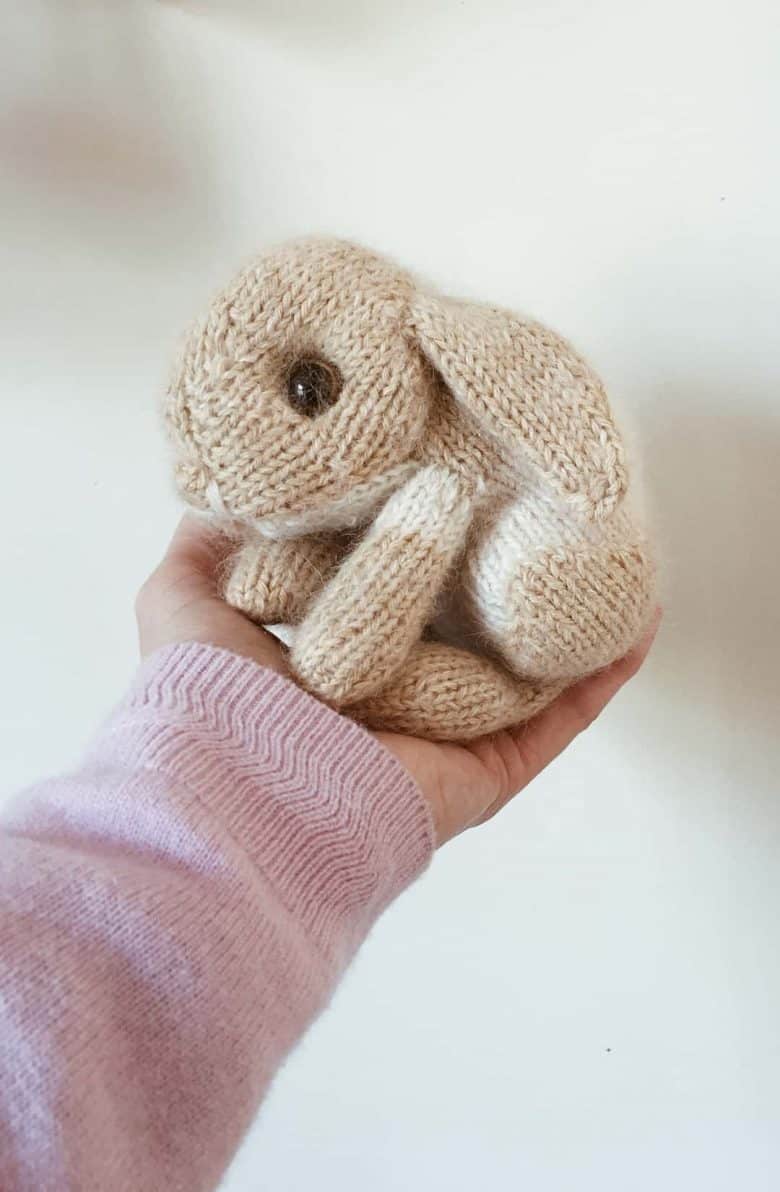
Stuffing Density Guide for Different Bunny Body Parts
| Body Part | Stuffing Firmness | Why It Matters |
| Ears | Minimal (20%) | Allows natural droop and movement |
| Head/Face | Soft (50%) | Enables face sculpting and moulding |
| Neck/Chin | Very Soft (40%) | Creates realistic loose flesh |
| Belly | Soft (60%) | Achieves baby animal vulnerability |
| Base/Bottom | Firm (80%) | Provides sitting stability |
2 Take time to mould the face
Play around with the face squishing to get the right shape for the face of the bunny. By that I mean use you fingers to indent the eyes, finding that correct bunny face look, before working the stitches that will create the eventual ‘face squish’. This is how I get the facial features just right. Then add in your eyes – either safety eyes or embroider them onto bunny’s head. Embroidering is a great way to make bunny a soft toy suitable for babies. Follow a similar technique for stuffing bunny’s body. Keep the body of the bunny and the bunny’s face softly stuffed so you can play around.
The Face Sculpting Secret:
Before adding eyes, spend 5-10 minutes manipulating the head with your fingers, creating subtle indentations where eye sockets naturally form. Only after achieving the perfect “bunny face look” should you secure it with internal stitches. This pre-shaping step is what transforms a generic stuffed shape into a creature with genuine character and expression.
The loose-stuffed belly also creates that authentic “baby animal” vulnerability that makes these patterns so emotionally compelling and photographable.
3 Experiment with different yarn
I’ve just bought some hand-dyed yarn which has specks of brown within it which I can’t wait to try out with some mohair. Note: I love knitting with mohair but it’s not a suitable material for babies under one year old. Finding the best wool is key.
Yarn Fibre Safety Guide for Different Age Groups
| Yarn Type | Safe for Baby (0-12 months) | Best Use |
| 100% Cotton | Yes | Hypoallergenic, washable |
| Acrylic | Yes | Durable, machine washable |
| Superwash Wool | Yes (test first) | Soft, easy care |
| Mohair/Alpaca | No | Decorative pieces only (1+ years) |
4 Consider ‘felting’ your bunny
If you wanted ‘extra’ fluffiness and you’ve used pure wool or alpaca – or maybe cashmere – why not slightly ‘felt’ your bunny? To do this: when the bunny is completed wash it in warm water with a tiny amount of liquid soap. Gently rub and agitate the toy by hand before rinsing out completely and rolling in a towel to remove excess water. Re-shape and sculpt then leave to dry away from direct heat.
The Yarn Alchemy: Transforming Your Bunny Through Selective Felting
Most knitters never consider felting as a finishing technique for toy animals, yet it’s the secret to achieving that coveted ultra-soft, heirloom quality.
When Felting Works Magic:
Using pure wool, alpaca, or cashmere creates opportunities for controlled felting that adds dimension and texture impossible to achieve through knitting alone.
The Controlled Felting Process:
• Knit with natural fibres (synthetic blends won’t felt)
• Complete assembly entirely before felting
• Use warm (not hot) water with tiny amounts of pH-neutral soap
• Gently agitate by hand for 3-5 minutes
• Watch for subtle fibre bloom—stop before full felting occurs
• Rinse thoroughly in cool water
• Reshape whilst damp, paying special attention to ears and facial features
• Air dry completely away from direct heat
What This Achieves:
Partial felting creates a fuzzy halo around the bunny whilst maintaining stitch definition, adds structural integrity so features hold their shape better, and produces that touchable, cuddly texture that makes the toy irresistible to children and adults alike. The technique works particularly beautifully with hand-dyed yarns containing natural colour variations.
Felting Success Matrix: Fibre Types and Results
| Fibre Content | Felting Potential | Texture Result |
| 100% Wool | Excellent | Dense, fuzzy halo |
| Alpaca | Very Good | Soft, subtle bloom |
| Cashmere | Good | Luxurious, light halo |
| Superwash Wool | None | Won’t felt (treated fibres) |
| Cotton/Acrylic | None | No change |
5 Make bunny bespoke
If you wanted to embroider some distinct markings on your (knitted) bunny then you could work some ‘duplicate stitch’, i.e. embroidering the ‘v’ shape to mirror the already knitted stitch (this pattern is stockinette stitch) in patches over the body or face. The pattern includes a knitted tail end but feel free to add your own pom pom tail if you prefer. If you want floppy ears on your little bunny, you could consider adding a couple of stitches near the base of the ear on the right side. Knit a bunny rabbit your way.
Strategic Yarn Pairing: The Hidden Technique for Depth and Realism
Whilst the pattern specifies DK yarn, the real innovation comes from holding two complementary strands together to create subtle colour complexity that mimics natural rabbit fur.
The Double-Strand Strategy:
• Primary strand: Main colour in DK weight
• Secondary strand: Mohair or kid silk in slightly lighter or warmer tone
• Hold both together whilst knitting
• Creates organic colour variation without complicated colour work
Colour Combinations That Work:
Main grey + silver mohair = realistic wild rabbit colouring
Cream DK + pale gold kid silk = warm, glowing finish
Brown DK + rust mohair = natural depth with highlights
White DK + palest pink mohair = subtle warmth in white bunnies
The Visual Impact:
This technique creates natural-looking colour variation similar to real rabbit fur, where individual hairs reflect light differently. The mohair adds a soft halo whilst the DK provides structure. The resulting bunny photographs beautifully because the mixed fibres catch light at different angles, creating dimension and visual interest that single-yarn projects simply cannot achieve. This approach elevates your bunny from “handmade toy” to “artisan heirloom piece” with minimal extra effort.
Customisation Techniques Quick Reference
| Customisation | Technique | Skill Level |
| Colour markings | Duplicate stitch embroidery | Beginner |
| Floppy ears | Add weight stitches at ear base | Beginner |
| Pom pom tail | Replace knitted tail with pom | Beginner |
| Embroidered eyes | Satin stitch or French knots | Intermediate |
| Clothing accessories | Separate patterns (coat, dress) | Intermediate |
Frequently asked questions
Can I make this bunny pattern with chunky yarn for a quicker project?
Yes, you can scale up to chunky yarn using 5.5-6mm needles, which will create a larger bunny (approximately 25cm tall) and knit up much faster. Keep in mind that larger bunnies require more stuffing and the facial features may need to be positioned differently to maintain proper proportions. The chunkier gauge also makes it easier to see your stitches, which some knitters find helpful.
What’s the best way to attach safety eyes so they’re secure for young children?
Position safety eyes before stuffing the head, pushing the post through from the right side and securing the washer on the wrong side as tightly as possible. For extra security with babies and toddlers, add a dab of fabric glue on the washer before pressing it on, and ensure no gap exists between the eye and the knitted fabric. Alternatively, embroider eyes using satin stitch or French knots, which eliminates any choking hazard entirely.
How do I prevent the seams from showing on my finished bunny?
Use mattress stitch for seaming, working on the right side of the fabric and pulling the yarn snugly every few stitches to make the seam invisible. Match your seaming yarn exactly to your main yarn colour and work in good lighting so you can see clearly where to insert your needle. Taking time with seaming makes an enormous difference in the professional appearance of your finished bunny.
My bunny’s head keeps flopping forward—how do I fix this?
The neck area needs strategic internal support created by running a few stitches through from the back of the head down into the body, essentially tacking the head at the desired angle. Work these support stitches after stuffing but before closing the final seam, adjusting the tension until the head sits naturally. Avoid overstuffing the neck area, as this actually makes the flopping worse by adding weight without structure.
Can I wash my finished bunny if it gets dirty?
Hand wash gently in cool water with wool-safe detergent, supporting the bunny’s weight throughout to prevent stretching. Never wring or twist the bunny; instead, press excess water out gently and roll in a towel to absorb moisture. Reshape carefully whilst damp, paying special attention to ears and facial features, then air dry completely away from direct heat or sunlight, which could cause colours to fade or fibres to felt unintentionally.
Important to remember
#1 Understuffing is the key to realistic bunny appearance because loose filling around the neck, chin, and belly areas mimics the natural flesh movement of real baby rabbits and allows for proper face sculpting.
#2 Face moulding must happen before securing features by spending several minutes manually creating eye socket indentations and the distinctive bunny expression, then locking the shape in place with internal stitches.
#3 Yarn choice dramatically affects the final bunny character with natural fibres like wool and alpaca enabling optional felting techniques whilst mohair blends create soft halos, though safety considerations require avoiding fuzzy fibres for babies under one year.
#4 The pattern uses only basic knitting techniques including knit stitch, purl stitch, increasing, and decreasing, making it genuinely accessible to beginners whilst still producing professional-looking results when construction details are followed carefully.
#5 Customisation transforms the basic pattern into unique creations through duplicate stitch embroidery for markings, ear modifications for different droop effects, alternative tail options, and embroidered versus safety eyes depending on the intended recipient’s age.
If you’re wanting to make a boy bunny toy, Claire has an adorable Peter Rabbit coat pattern, or why not make a dotty dress if you have a girl bunny in mind?
Follow #IMadeThisRabbit for inspiration
And finally, when you are finished, or if you want more inspiration and to discover more joyful things – then follow along with my hashtag #IMadeThisRabbit on @dotpebbles_knits Instagram or my facebook page with the same hashtag name.
This pattern includes knit stitch and and purl stitch as well as knitting two together, purling two together, knitting into front and then back of stitches as well as purling into back and front of stitches. With no garter stitch repeat rounds or anything else more complicated to master, this is a great beginner project.
DOWNLOAD YOUR FREE BABY BUNNY KNITTING PATTERN HERE
Download your FREE baby Bunny knitting pattern
To download your FREE knitting pattern with full details of how to knit your own baby bunny rabbit, click here >> Easter Bunny Knitting Pattern PDF
Other bunny patterns you might love
Sleepy bunny
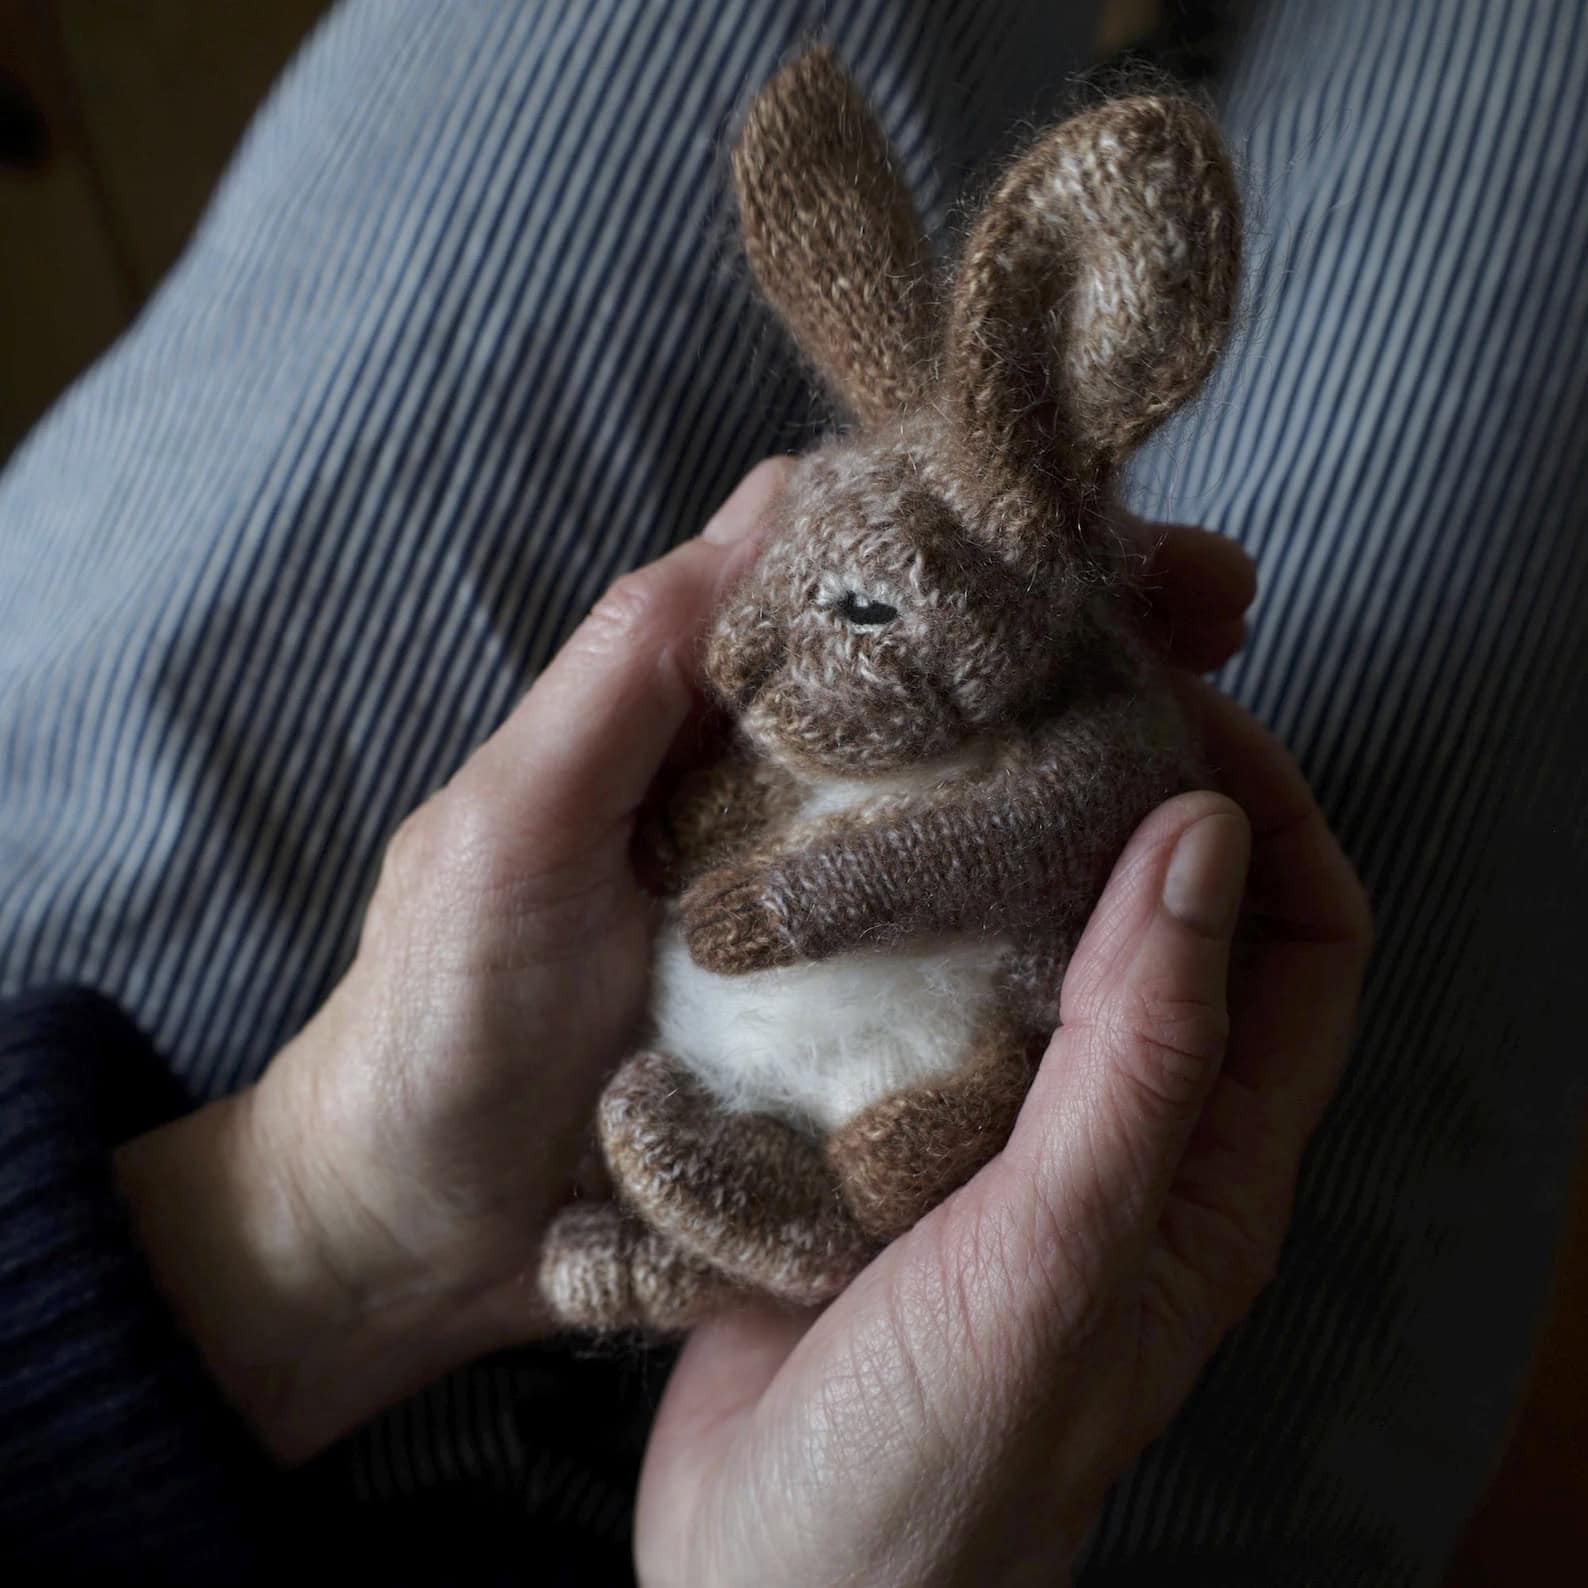
Holland Lop Rabbit knitting pattern
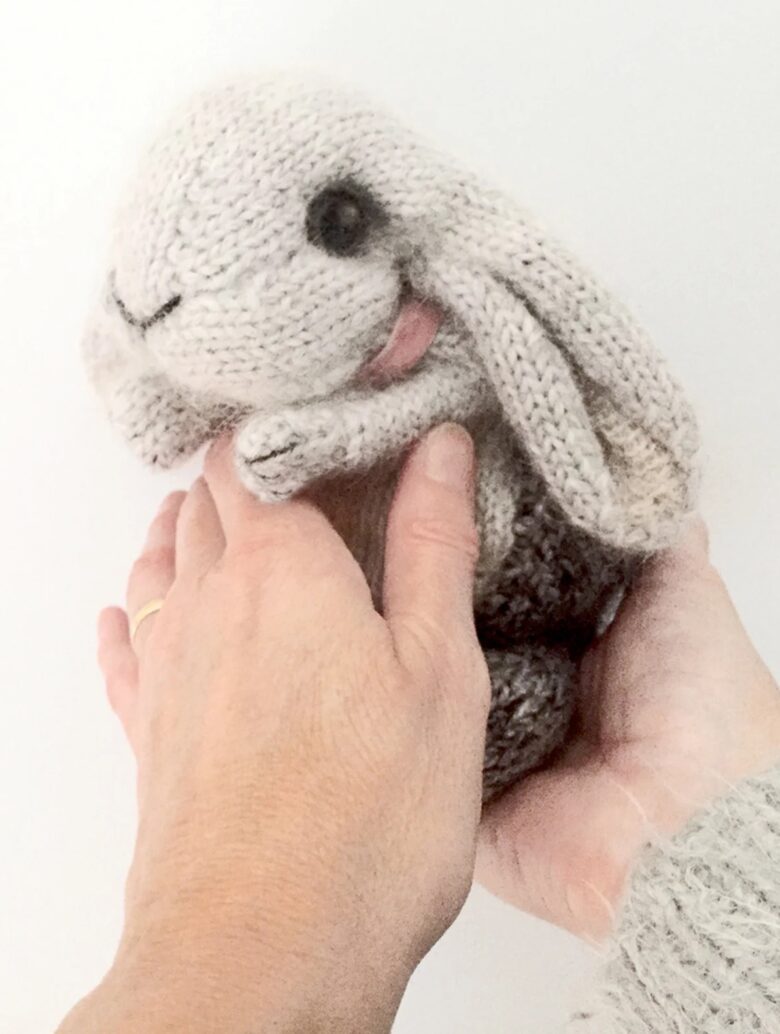
BUY HOLLAND LOP RABBIT PATTERN NOW
Cute bunny toy knitting pattern
Free baby bunny crochet pattern

I’ve also found this totally adorable baby bunny crochet pattern by Stephanie Lau which you can read for free online here. To download her pattern as a printable PDF, you can also buy it on Etsy here. Add a tiny pom pom for the tail. Such sweet little guys…
Possibly the easiest beginner knitted bunny with pompom tail is this little cutie by Studio Knit. The pattern (and video tutorials) is free here
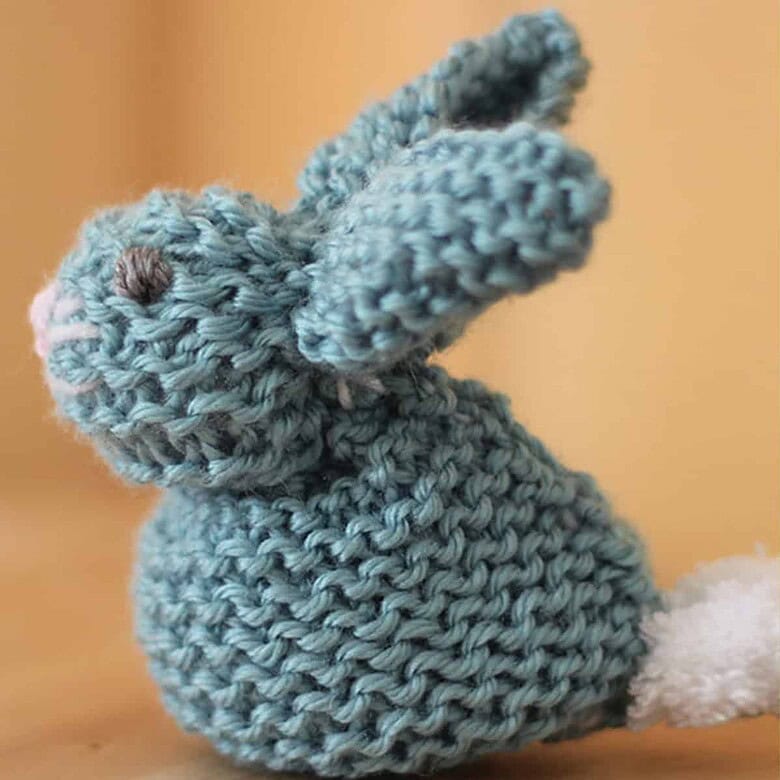
Other Rabbit knitting patterns by Claire available to buy
Find all of Claire’s other adorable patterns available to buy from her Etsy shop here
Teeny Tiny Bunny knitting pattern


BUY TEENY TINY BABY RABBIT PATTERN ON ETSY HERE
Rabbit Doll knitting pattern

How adorable is this new rabbit doll knitting pattern by Claire? It’s available to buy as a PDF download on Etsy (at the time of writing it’s available at a special introductory offer price). It’s knitted flat knitting on 2 needles, body made with minimal seaming joining as you go, but with such short rows, it won’t take long to make.
There’s also a helpful video clip on Instagram here:
View this post on Instagram
Cinnamon Dutch Rabbit knitting pattern

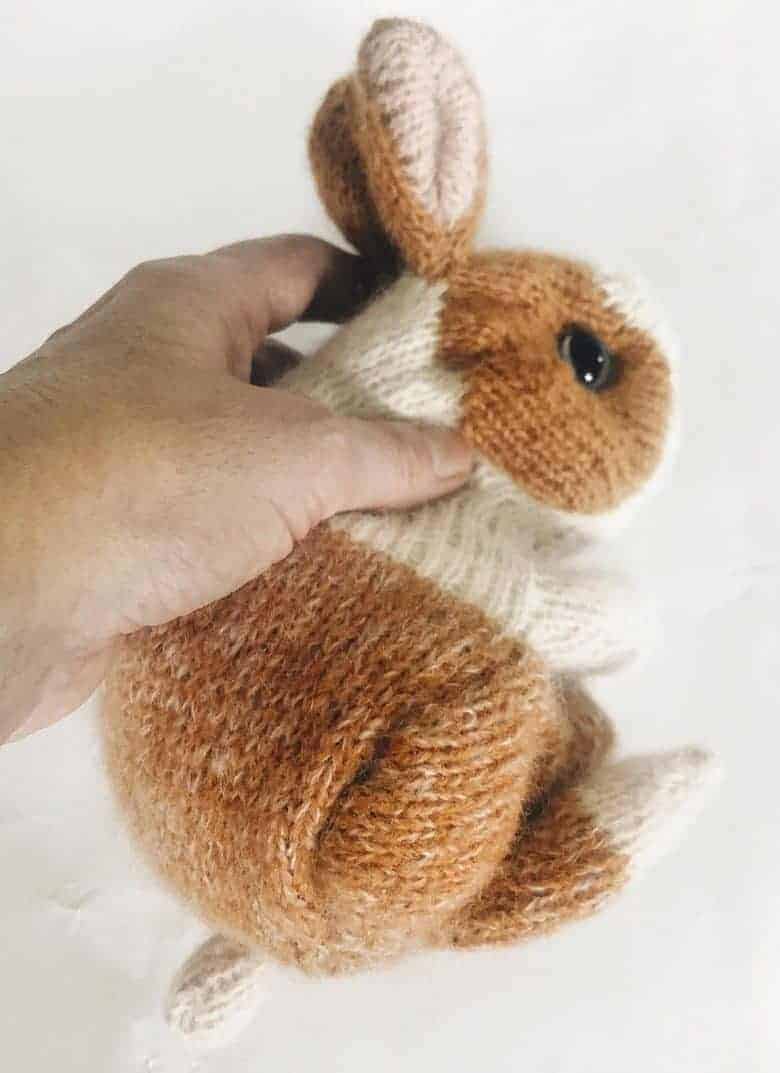
Buy Cinnamon Dutch Rabbit knitting pattern on Etsy here
Peter Rabbit knitting pattern

The Peter rabbit pattern also includes carrots and his little blue coat.

BUY PETER RABBIT KNITTING PATTERN HERE
New little baby bunny knitting pattern

BUY THE LITTLE BABY BUNNY RABBIT PATTERN HERE >>
Wild Rabbit knitting pattern
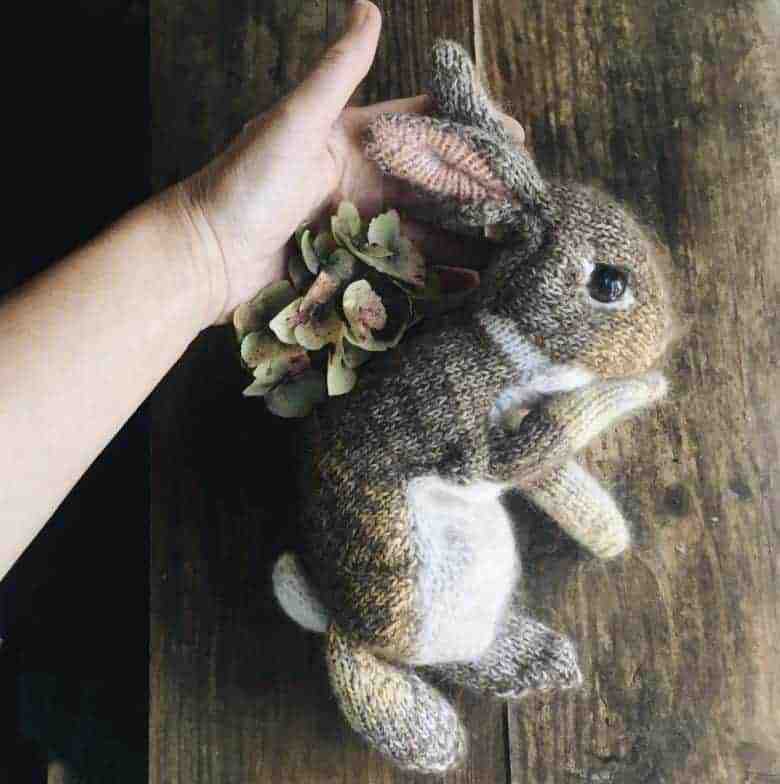
Peter’s Coat limited edition knitting pattern
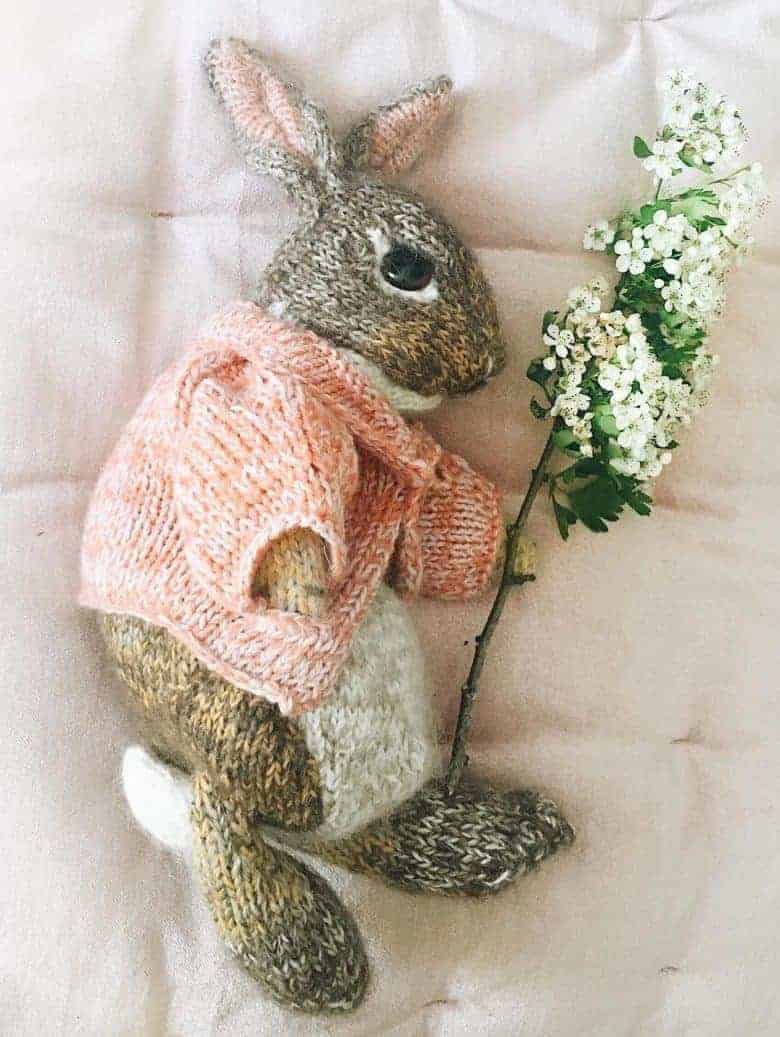
BUY PETER RABBIT’S COAT PATTERN NOW
Netherland Dwarf Rabbit knitting pattern
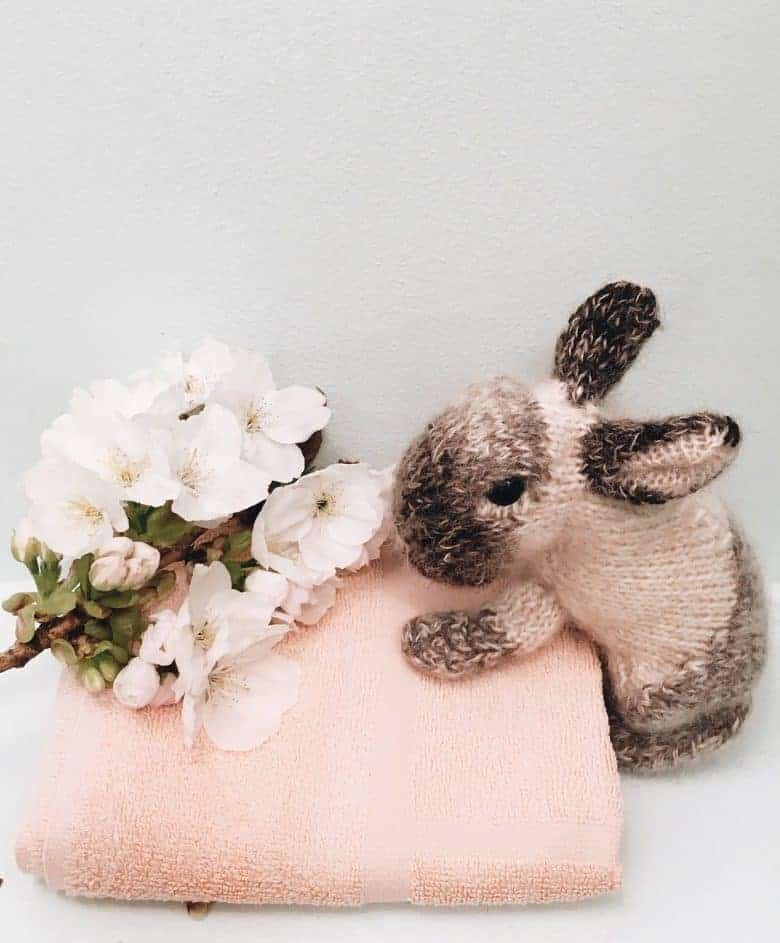
BUY NETHERLAND DWARF RABBIT PATTERN NOW
Black Otter Rex Rabbit knitting pattern

BUY BLACK OTTER REX RABBIT PATTERN NOW
Rabbit Knitting pattern

Dutch Rabbit Knitting pattern

Baby Bunny (also available in french)

Claire’s pattern books to buy
Magical Woodland Knits – buy now
 Also by Claire: Knit & Purl pets BUY NOW; Dream Toys BUY NOW
Patterns by other makers you might like
Sleeping bunny knitting pattern

Buy the sleeping bunny knitting pattern on Etsy here.
INFORMATION
Monica Fuertes handmade awards is a great source of pattern inspiration
Dot Pebbles is listed in the From Britain with Love directory here >>
How to receive all of Claire’s free patterns
Sign up for #freebiefridayknits bimonthly free knitting patterns by Claire which includes a heavenly knitted lamb here
If it’s bear patterns you’re after, check out Mary Jane’s Tearoom on Etsy
Are you a maker or creative course provider? Like to list with us and benefit from joining our supportive community? We’d love to hear from you. Check out the packages we offer on our Join Us page
This article contains affiliate links, which means we may earn a small commission if a reader clicks through and makes a purchase. All our blog posts are independent and in no way influenced by any advertiser or commercial initiative. By clicking on an affiliate link, you accept that third-party cookies will be set.
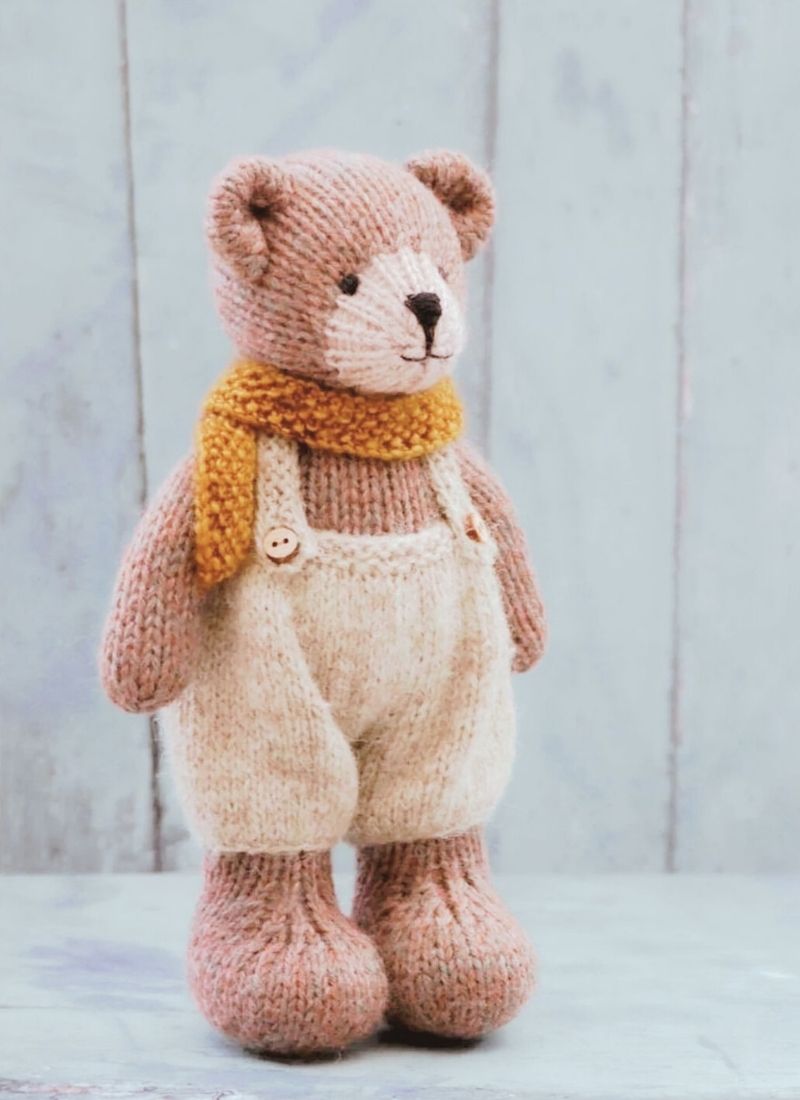


Where do I obtain this lovely pattern?
You should be able to click the link above the pattern PDF to download it – or with this URL https://www.frombritainwithlove.com/wp-content/uploads/2019/03/EasterBunny.pdf
Thank you
Adoreable..lovely😍😍😍😍😍😍😍
Peut on avoir les patrons en francais?
Can you send it on Messenger on Facebook?
You should be able to get the pattern here: https://www.frombritainwithlove.com/wp-content/uploads/2019/03/EasterBunny.pdf
hope that helps!
How can i get this free pattern please.
Hi the free pattern PDF is linked to from the blog post – and also here https://www.frombritainwithlove.com/wp-content/uploads/2019/03/EasterBunny.pdf
Thank you so much for your free pattern, I am really in love with your knit Rabbits. This is my first time to knitt, I’m so excited.
Unable to download this pattern using links provided. Can you please advise?
Just tested it and working fine for me… can you get the PDF here?: https://www.frombritainwithlove.com/wp-content/uploads/2019/03/EasterBunny.pdf ?
This is gorgeous!! Thank you for sharing
I’m so glad you like it – do share a photo if you make one!
Thank you for sharing, I will knit it soon!
Glad you like it – enjoy!
A couple of these are crocheted is there a pattern for those too??
I did a bit of a search and found this… https://www.lovecrafts.com/en-us/p/crochet-bunny-crochet-pattern-by-dot-pebbles hope that helps!
Thankyou..😜
Good morning, oh, I so wish I could knit. I’m in love with your bunnies. Do you also crochet the little creatures?
So glad you love the bunnies too! I’ve just had a look through Claire’s patterns on Ravelry and can’t see a crochet bunny. Maybe contact her directly via the links in her directory listing – links at top and bottom of this blog post. Good luck!
Thank you so much and to Dot Pebbles! Can’t wait to make them for my girls! 💙
Enjoy! would love to see your finished bunnies!X
Can you buy one or can you not buy one so cute I am not that talented
Hi Sarah – Claire doesn’t sell the finished bunnies as far as I know – just a wide range of patterns, some easier than others…
I love this pattern but am a little confused when I get to the legs do I do them separately? I this is the first thing I’ve ever knitted properly so I really want to finish it
Hope you manaaged to sort by contacting Claire directly via the email address I shared claire@dotpebblesknits.com 😊
Do you have a crochet pattern for this bunny?
There’s no crochet pattern as far as I know but there is the free knitting pattern: https://www.frombritainwithlove.com/wp-content/uploads/2019/03/EasterBunny.pdf hope that helps! 😊
Since writing this, I have found one crochet pattern by Dot Pebbles if helpful… https://www.lovecrafts.com/en-us/p/crochet-bunny-crochet-pattern-by-dot-pebbles
Just love this bunny. I’ve downloaded the pattern but I get stuck on the section of the left hind leg. my bunny looks all out of proportion when I’ve done the short rows after row 38. The pattern doesn’t seem to have rows 39 to 60. Please help. I really want to finish this little baby. Thank you.
If you’re stuck, Claire (who created the pattern) is happy to help via email Claire Garland
Grazie di cuore! Il coniglietto è fantastico!❤
Il mio piacere e grazie! X
I am about to start making this adorable bunny, I was noticing the stitch markers you have. I just have the rings. Will they work or will they be stuck in the bunny? Do I need to be able to take the markers out of the piece?
Thanks!!
Hi Claire has replied to your question:
yes, plastic makers are fine or just strands of coloured yarn – they must be removable though
Hope that helps and good luck with your bunny!
Hello Billi Jo
I have asked Claire your question and will post her answer here when we have it!
Thanks
Laura
So excited for this little rabbit I’ve been knitting all day! I’m a little stuck at the 25 st pickup for belly how should the tail be? Do I pinch the tail together and keep picking up on both sides of the tail?
So glad you’re enjoying making this bunny! I have asked Claire about your question – will post here as soon as I hear back!
Hi
Claire has replied: Turn out to RS, mattress sew the tail seam
Hope that helps and good luck with your bunny!
I need help! finished the first piece and I’m unable to see where I need to pick up the 25 stitches for the belly. left thigh marker downwards to where exactly?
Thank you for your help!
christine
Hope you managed to sort by contacting Claire directly via the email address I shared claire@dotpebblesknits.com 😊
Hi did you find out how to do this? I’m in need too? Please? 😃
I can’t find where in the pattern I was supposed to put the outter thigh marker. Is it at the color change before the cast on for the short rows?
Hi – I have passed your query on to Claire asking her to contact you directly with the answer – good luck!
I need help! finished the first piece and I’m unable to see where I need to pick up the 25 stitches for the belly. left thigh marker downwards to where exactly?
Thank you for your help!
Hi, what a beautiful bunny. Im just stuck at the picking up 25 stitches? Not sure where to pick up cause it seems like more than 25. Please help!
Best to email Claire Garland (whose pattern it is) directly: claire@dotpebblesknits.com
hope that helps and happy knitting!
Best to email Claire Garland (whose pattern it is) directly claire@dotpebblesknits.com with any questions. Hope that helps and happy knitting!
I seem to have missed where the thigh markers go . .which row? I am knitting a single colour so am also confused with page 4. . . left hind leg is that actually the thigh as shown in pix? can there be another cast on method for these rows as I am not familiar or as working in one colour am confused . . . sorry must be getting too old
Hi Faye – I have passed your query on to Claire asking her to contact you directly with the answer – good luck!
Hi, also at same stage. Do not understand what pick up and knit round to right Thigh means. Pattern confusing.
Hope you managed to sort by contacting Claire directly via the email address I shared claire@dotpebblesknits.com 😊
In case you still need some help finishing your bunny, Claire (whose pattern it is) is very happy to answer questions by email: claire@dotpebblesknits.com Good luck !
Hi Laura. Thanks for sharing the bunny pattern! I’m on page 8 now and about to create the belly but I’m a bit confused how to kick up the left thigh marker and knit 25 sts to the right side. Can you please instruct me or show me a picture 🙂 Thanks!
Yes me too,please
Hi – best to contact Claire directly be email – she’s happy to answer any queries etc directly claire@dotpebblesknits.com Happy knitting and hope that helps!
Hi Laura, I’m having the same issue as Charlene, I don’t understand how the belly is knitted.
Thanks!
Please do you have this explications in franch
Thanks.
Bonjour – I hope the translated pattern instructions I sent over worked for you! 😊
Hi Laura, would you be kind enough to send me also yeah the French version of the pattern!
Thank you,
Denise
I’m a little confused on the belly. It goes Row 26 P, then the short rows to create the mouth, but then it picks up with Row 34. What are rows 27-33 supposed to be? Thanks for your help! 🙂
Hope you managed to sort by contacting Claire directly via the email address I shared claire@dotpebblesknits.com 😊
Hi there. Can someone help please. I have completed to row 69 and have 41sts. The next instruction is …..
“separate lower back from hind legs”.
Then “P31″…..
Not sure what to do here.
Help please.
Many thanks
Denise
Hope you managed to sort by contacting Claire directly via the email address I shared claire@dotpebblesknits.com 😊
Is the black otter Rex rabbit pictured in your post yours? If so I can tell the front legs have been adapted. Would you care to share what you did differently? And any other adaptions you made. I love love love the shape of the Ottter Rex pictured. I just finished my first and I should have spent more time shaping before I sewed her up! I will be using these tips next time!
Would love to see your next Rex rabbit! Claire is happy to answer any questions directly via email if you’d like to contact her about how she adapted her black otter Rex rabbit pictured… claire@dotpebblesknits.com 😊
I loved the pattern. Can you please give instructions on how to finish the inside of the ears? I didn’t see it in the pattern.
Thank you
I love this pattern but am a little confused when I get to the legs do I do them separately? I this is the first thing I’ve ever knitted properly so I really want to finish it
Hi Hollie
I don’t know if you’re still stuck, but if you need help, Claire is happy to assist if you email her directly claire@dotpebblesknits.com
hope that helps!
Hi Laura, I have Claire’s bunny pattern and wondering if one can sell the made up bunny. I have seen them for sale on Etsy but is this an infringement of Claire’s copywrite?
Hi Judith
It’s probably best you ask Claire about this directly – her email address is claire@dotpebblesknits.com
Good luck and thanks for checking 😊
Hello. I’ve either gone horribly wrong or instruction for sewing in the belly is missing. Which is it?
Hello Frankie – best thing to do is to email Claire directly with your question – she is happy to answer an queries via claire@dotpebblesknits.com
Good luck!
These are seriously cute! Wish I knew how to knit. Thanks for the inspiration.
It’s never too late to learn…😊
Thank you sooo much for this free pattern !
my pleasure – glad you enjoyed!
I don’t know how to knit but i would like to have one of these bunnies. Do you have an online shop? Greetings from México.
Thank you for the FREE pattern! I’m excited to make four of these for my grandchildren! Your pictures are perfect! I’m a moderate level knitter – so we will see how it goes!
Thanks so much hope you enjoyed! 😊
Hello Sarah, have you finished knitting the bunnies? I’m interested in purchasing a finished bunny (maybe two)…with jackets. Would you be interested in making and selling? Thank you.
Hello! I’m writing from the United States. I feel very lucky to have found your site and the Easter bunny pattern. I have just finished the tail (mine seems a little off but that’s fine). I plan on knitting some Christmas clothes for the bunny when I finish it. I think the shaping is absolutely amazing. I’ve never worked on a pattern like this and am awed. Thank you for offering it for free.
When my sister and I were young, we dreamed of being British. My sister’s Brit name was Amelia Elizabeth Bentley (after the car), and mine was Sarah Elizabeth Crumpet (sorry – didn’t know what a crumpet was, just knew it was British). Now I have to revive those dreams, and hope that one day I can ‘Knit like a Brit.’
So lovely to hear from you and I LOVE your Brit name – I am quite partial to a buttered crumpet with a good cup of tea…! It’s great to have you here and I’m so glad you enjoyed making the bunny! X
I’m planning on making this gorgeous pattern for an infant and don’t want to put the eye attchments for fear they could be a choking hazard. Any thoughts on alternatives? Have you seen anyone make without? Wonder if the magic would be lost?
Hi Vanessa
You could always try felted eyes – Lincolnshire Fenn Crafts has a great tutorial here https://lincolnshirefenncraftsblog.com/2019/10/03/8-easy-steps-to-needle-felted-animal-eyes/
Some of the pics have bunnies with jackets, does the pattern come with the jacket?
Hi – not as far as I know, but you could always ask Claire Garland (whose pattern it is)… claire@dotpebblesknits.com
hope that helps!
Hi Vanessa
You could always try felted eyes – Lincolnshire Fenn Crafts has a great tutorial here https://lincolnshirefenncraftsblog.com/2019/10/03/8-easy-steps-to-needle-felted-animal-eyes/
Her email doesn’t work just FYI.
Hi Not sure what the problem is – I’ve emailed her recently on that email address no problem – but Claire does have another email address to try if you still need help – claire.garland@btopenworld.com
Hope that helps
Hello loving this pattern! However I’m stuck on row 39/40 of page 3, where it tells you to cast on 7 at the beginning of each row. Does this mean to cast on 7 St and then to knit the row and then cast on 7 again before you purl?
I did email, but would love an answer if someone has done this part already
Hi Melanie
Glad you’re enjoying the pattern. Claire has suggested that anyone getting stuck should contact her via email so she can help: claire.garland@btopenworld.com
Good luck!
dutch rabbit pattern has a mistake on page 28 left foreleg says to pickup 4 sts should be 6 sts to match other leg
Hi Carol – just to let you know that Claire has updated and improved the free bunny rabbit knitting pattern – hope it helps! https://www.frombritainwithlove.com/wp-content/uploads/2019/03/Easter-Bunny-for-Love-Knitting1.pdf
Hello. I can’t knit to save my life. Is there anywhere I can buy one of these rabbits ready made? Sorry if you are going to gasp in horror at my audacity!!
Annie
Sorry don’t think Claire sells them ready made… perhaps worth a look on etsy or similar?
Hello: Did anyone else find that row 61 said to knit 15 stitches to end and you had 16 stitches? I have a total of 43 stitches on the needle if I knit the 16 to end. Then cast on six for next row (49 stitches)? Once you get to row 63 there are two decreases which leave 47 on needle.
Hi Susan – Claire has updated and improved the pattern – we’ve replaced the previous pattern, or you can download it here https://www.frombritainwithlove.com/wp-content/uploads/2019/03/Easter-Bunny-for-Love-Knitting1.pdf hope it helps!
As noted several times in the comments, the instructions don’t include placement of the outer thigh marker but do refer to that marker later. The answer here is always the same, contact Claire directly. Perhaps you could contact her for clarification on thus point on post the answer rather than having each individual do so? Or post a link to updated directions where that oversight has been corrected? Much aporeciated!
Claire has kindly amended and improved the pattern – we’ve replaced the previous pattern. You can also download the updated and improved pattern here https://www.frombritainwithlove.com/wp-content/uploads/2019/03/Easter-Bunny-for-Love-Knitting1.pdf with a few more images to help you with the making up.
Hi, I love the bunny and am knitting it right now, but I’ve got to the belly and it says begin at left outer thigh marker etc. I’ve looked and looked at the pattern, but cannot find where it said I should have placed them, so I dont have any….. I’m so glad for the photo, I can guess at it, but where should they be placed please?
Hi Sara best thing to do is to email Claire directly with your query. Hope that helps and happy knitting! claire.garland@btopenworld.com
Hi, I’m halfway through making this cute bunny and wondered if there’s a pattern for his little jacket! Thank you in advance
Tracey 😊
Hello, I haven’t knitted since I was in my teens/twenties, I’m over sixty. I really want to try this since I’m a grama now and making gifts for a grandson would be so fun. Thank you for sharing.
This is the most adorable bunny I’ver ever seen… I will need to knit it in the future, I is in my to do list ♥️
Love from Brazil!
I’ve nearly finished my bunny . I’ve experimented with my wool and can’t wait to finish him. He’s helping me through quarantine
I just wondered is there a pattern for the little jackets some of them have on ?
Thanks so much for making this pattern available I’m loving it x
So glad you’ve enjoyed knitting your bunny. Not sure if Claire has made patterns for the little jackets – best to email her directly claire@dotpebblesknits.com
Hope that helps!
Thank you for the bunny guide, it’s amazing.
glad you like it!
As someone who loves rabbits and had them for many years I want to tell you how realistic your rabbits are, it is truly amazing! Thank you also for providing the pattern for people who want to branch out of the normal knitting projects, I look forward to trying this.
Its a great deep dive post Claire. You have some really cool stuff and gifts For Knitters That They Really Can’t Get Over With! Keep up the good work.
Thanks for your lovely comment 🙏
Thank you so much for the video on how to put the pieces together. I am right now at that point with my first bunny.
Loving the Easter Bunny free pattern which I found through Hobbycraft on FB and have downloaded the latest one and I notice on Page 9 & 10 for the ears the wrong letter codes are given for the wools.
They are given as B – peach mohair & C – Straw DK.
At start of the pattern Straw dDK is coded as A.
Fortunately the description and code are given so it’s easy to use the correct colours.
Thought I’d mention here in case anyone else is confused.
I am really thankful for this lovely free pattern and will be buying some of Claire’s other patterns as they are so beautiful. A very talented lady!
The word “menagerie” is perfect here—it makes the collection feel alive and intentional, like each little creature belongs together.
This was a delightful and easy-to-follow tutorial. I appreciate how the step-by-step instructions make this Easter bunny knitting project approachable for crafters of different skill levels. Thank you for sharing such a creative free pattern that inspires handmade gifts and enjoyable crafting experiences.